Survive a Million Monkeys Beginner Guide: First Run
Learn Survive a Million Monkeys with a first-run route covering Cash, Gems, reported PC controls, movement, upgrades and a useful post-run review.
Finish the opening instructions, use a class and gun you already own, keep an escape route open and spend run Cash on the immediate threat. Afterward, inspect the Gem reward and change one cause of failure.
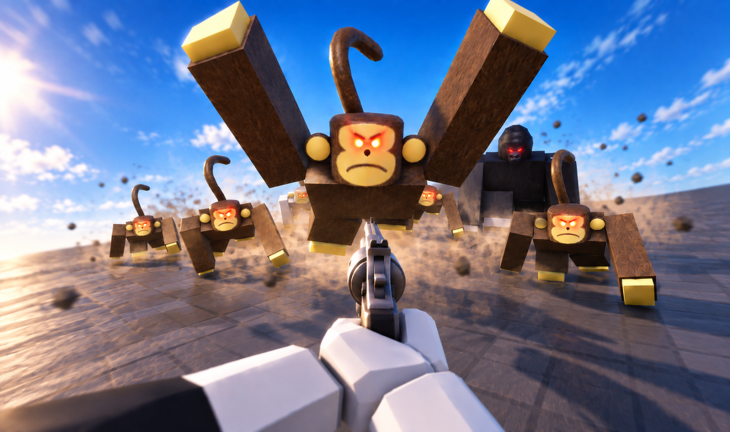
View reference image
On this page
Build your first run around movement and upgrades
Start Survive a Million Monkeys by completing the opening instructions, selecting a class and weapon you already own, and entering a run with a simple plan: keep an escape route open, spend run Cash on the problem that is threatening you, and use the resulting Gems to improve the next attempt. The official Roblox description names the central goals: choose a class, unlock guns, fight hordes together and climb the survivor leaderboard.
A first session is useful even when it ends early. You want to leave knowing how your gun handles, where upgrades appear and which situation caused the defeat. The game is a survival challenge rather than a promise of a final winning wave. Do not measure the first attempt against a creator using equipment you have not unlocked.
This guide was reviewed on October 15, 2026. Official identity and store offerings were checked through Roblox’s public records. Control and economy details are attributed to the dated player references in the sources. The linked creator videos provide visual context; our editors do not claim a current-build personal playtest or an independently verified reward formula.
Open the correct game and finish its introduction
Use the official place 99409088950210, published by gorilla warfare. The universe ID 10673920146 appears in the public game API. Confirming the experience matters because a code, class or weapon from another monkey-themed game will not become valid here.
Follow the tutorial prompts rather than skipping past an unfamiliar upgrade button. Learn where the game shows your current health, run Cash, selected weapon and available abilities. On mobile or controller, use the on-screen action labels; the keyboard reference below does not establish the exact input for every device.
The official description advertises MONKEYS for 1,000 Gems on the review date. Treat that as a developer-listed offer, subject to your account’s redemption response. Use the in-game Codes control and confirm the result. A listed code is not proof that your account has claimed it, and Roblox gift-card redemption is a different interface.
Keep Cash and Gems separate
The dated beginner reference describes Cash as the run’s spending currency and Gems as progression used between runs. This difference explains a common confusion: unlocking a gun in the hub and raising the weapon tier during combat solve different parts of progression.
Use the combat upgrade control when the current run needs more firepower or health. Use the hub menus when deciding which class or weapon option to own for future attempts. Read the currency icon beside a price before accepting it. A Gem balance does not automatically mean you can afford an action priced in run Cash.
Think of Cash as a way to keep the present attempt workable. Hoarding it while the horde closes in can end the run before the saved currency helps. Think of Gems as a choice between future options. Spend them on a limitation you can identify, rather than buying a rarity label simply because it looks impressive.
Learn the combat controls while pressure is low
The keyboard controls below are reported in the October 6 beginner reference. Check the current HUD if an update or selected class changes an action. In particular, G and X are class ability positions; Grenade and Barricade describe Survivor’s kit, not every class.
| Action | Reported PC input | What to verify in the current HUD |
|---|---|---|
| Move and jump | WASD and Space | Your device’s movement controls |
| Aim and shoot | Mouse and left button | Weapon handling and firing feedback |
| Weapon-tier upgrade | V | Cash price and next tier |
| Health upgrade | C | Current requirement and benefit |
| Regular class abilities | G and X | Names, cost and availability for this class |
| Ultimate | Q | Charge or readiness indicator |
Practise reading these controls before a crowded wave. When an action does not activate, check whether it is unavailable, unaffordable or aimed incorrectly. Repeatedly pressing a button without reading the message will not distinguish those causes.
Choose a position with a visible exit
Before committing to a firing position, look for the route you would use if monkeys approach from the side. A comfortable sightline is useful only while you can leave it. Avoid backing into a dead end while aiming at the closest target.
Move early when the escape lane starts narrowing. The purpose is to preserve room for the next decision, not to keep moving randomly. Turn toward open ground, clear the enemy that blocks the route, and reassess the crowd before stopping again. A narrow passage may group enemies, but it can also trap you when the exit closes.
In a group, pay attention to teammates’ positions. Spreading so far apart that nobody can help can undermine the advantage of playing together. Standing on the same point can also hide incoming threats and make repositioning awkward. Aim for enough separation to see your lane while keeping the group’s planned route understandable.
Spend on the cause of danger
If ordinary gunfire no longer controls the approaching pack, inspect the next weapon-tier upgrade. If repeated damage leaves no margin for a mistake, inspect the health upgrade. If an available class ability can reopen space, read its cost and use it while the opening still matters.
There is no universal purchase order that works for every class and run. A player losing to a blocked route needs a different adjustment from one who simply forgot to upgrade. Make the decision from what is happening, then check whether the change actually improves that condition.
Survivor’s documented tools are Grenade, Barricade and Airstrike. Use those names to recognise the starter kit, then learn the actual targeting and placement feedback. A barricade placed without an exit plan can complicate movement. An area attack used when only a few enemies are present may leave less help available for a crowded moment. These are tactical considerations, not a fixed damage or cooldown table.
Use the class and weapon as one loadout
Your class changes available abilities, while the gun handles much of the ordinary firing. Buying a new class does not remove the need to learn the selected weapon. Equally, a stronger-looking gun will not automatically solve poor placement or an unused recovery ability.
Stay with the starter kit long enough to recognise one clear problem. For cooperative recovery, investigate Medic. For a defensive position, inspect Engineer’s placement and repair tools. For a damage-oriented option, compare the relevant class descriptions with how you actually move and aim. The class choice guide explains a role-based decision without pretending that one ranking fits every account.
The gun unlock guide separates hub ownership, run tiers, reward requirements and official premium bundles. Read it before treating an item shown in a video as a free tutorial reward or an immediate starting gun.
Review the result before spending Gems
After the run, inspect the reward screen and hub balance. Record what the game actually awarded, rather than inferring a Gem rate from a single clip. Contributions, run length and update changes can affect what a player observes; this guide does not publish an unverified calculation.
Write down the defeat cause in one sentence. Useful examples are a closed escape lane, an unpurchased upgrade, an ability you did not understand, or a gun whose handling did not fit the range. Choose one change for the next attempt and keep the rest stable enough to compare.
If you already own a purchased class or weapon, confirm it is equipped before testing the new setup. A completed purchase and an active loadout are separate checks. Read any restrictions in the menu, then verify the HUD after entering the run.
A practical first-session finish line
A useful first session ends when you can navigate the hub, identify Cash and Gems, buy an appropriate run upgrade, use your class actions and explain one next improvement. You do not need a rare class or an expensive bundle to learn those decisions.
Return to the Survive a Million Monkeys hub for the official game link, sources and videos. Continue to class choice when the next decision is your role, or gun unlocks when a menu item or weapon tier is the blocker. Build a repeatable attempt before chasing somebody else’s record.
Step-by-step guide
- Learn the opening interface
Identify health, run Cash, weapon-tier upgrades and the class actions before entering a crowded fight.
- Preserve space and upgrade deliberately
Move before the escape lane closes and inspect the upgrade that addresses damage pressure, health loss or a blocked route.
- Review the run before spending Gems
Read the actual reward, record one defeat cause and verify the next loadout is equipped before another attempt.
Quick reference
First-run checks
| Stage | Action | Result |
|---|---|---|
| Tutorial | Locate Cash, health and actions | You understand the live HUD |
| Combat | Keep an exit and inspect upgrades | You can respond before a surround |
| Hub | Read the actual Gem reward | One deliberate next investment |
| Next attempt | Verify selected gun and class | A comparable test |
Video evidence
Watch creator walkthroughs alongside this guide. Check the recording date before following requirements that may have changed.
ROBLOX SURVIVE A MILLION MONKEYS..
See the game interface and horde-survival context. Creator rankings and entertainment footage are not official statistics or guaranteed unlock routes.
FAQ
Is this an official developer guide?
No. This independent fan project separates official Roblox records, dated player reports and original planning recommendations.
What if a live price or requirement differs?
Use the current HUD, weapon or Classes panel and official offer description. Report the exact changed text and date through Contact for review.
Sources
Recheck these links whenever the game version, release status, or strategy changes.
- Official Survive a Million Monkeys experience Game identity, class/gun/co-op objectives and developer-listed MONKEYS reward; reviewed 2026-10-15.
- Official Roblox game API Universe 10673920146, root place 99409088950210 and creator gorilla warfare.
- Official public game-pass catalogue Exact listed contents of Gunslinger Bundle, Dimitri's Bundle and Starter Pack; checked 2026-10-15. No purchase was made.
- AllThingsHow beginner reference, October 6 Attributed Cash/Gem economy, reported keyboard controls and four-tier progression; current HUD takes precedence.
- Dated class reference, October 6 Named six-class roster and broad abilities; current Gem costs and upgraded statistics are omitted.
- Survive a Million Monkeys Guide! (Codes, Glitches, Best Classes & Weapons) ROBLOX Metadata, date and public embed availability verified; no caption text obtained due HTTP 429.
- ROBLOX SURVIVE A MILLION MONKEYS.. Metadata, date and public embed availability verified; no caption text obtained due HTTP 429.